How to secure Azure Files with Azure AD account permissions — February 17, 2020

How to secure Azure Files with Azure AD account permissions

Salaam, Namaste, Ola and Hello!

For those who are new to my blog welcome, and to those returning a big thanks! It has been a while since I did a more technical blog so hopefully you will enjoy this one!

Today’s post is based on a recent experience I had which involved a customer who are fully SaaS Microsoft Cloud (Office 365, SharePoint Online, Azure AD and Intune for MDM). They had a requirement where they wanted to use an on-premises Windows based file share but wanted to utilize their existing Azure AD cloud only accounts to set permissions to the folder structure, as you do when you have an on-premises Active Directory Domain.

The Windows Server was a 2016 Virtual Machine hosted in Azure (IaaS), however it was not part of any domain as Azure AD does not allow you to ‘add devices to the domain’ but enroll them, which was not going to help in this scenario.

When investigating this I thought the best way to implement this was going to be an ‘Azure Files’ share https://docs.microsoft.com/en-us/azure/storage/files/storage-files-introduction. Azure Files offers fully managed file shares in the cloud that are accessible via the industry standard Server Message Block (SMB) protocol and can be mounted to an on-premises Windows server as a file share. However this still did not solve the permissions side of my issue, as in its default state you cannot assign Azure AD permissions to an Azure Files share.

The solution…implement Azure Active Directory Domain Services into the tenant. This would then sync with Azure AD, and I could then add the Windows Server 2016 to the ‘Domain’ in the traditional way you would if on-premises.

Difference between Azure AD and Azure AD Domain Services: The traditional Windows share supports authentication on a ‘managed domain’ which is not what Azure AD is. Azure AD does not generate or store password hashes in the format that is required for NTLM or kerberos authentication, and this is where Azure AD Domain Services comes into the picture, as this stores password hashes in the same way an on premises Active Directory domain controller would.

There are obviously a lot more differences between the two, but the ones that are relevant to this issue were above. For a full break down and comparison of Azure Identity Services I recommend reading through this article: https://docs.microsoft.com/en-us/azure/active-directory-domain-services/compare-identity-solutions

Identity Management

Azure Active Directory Domain Services was very easy to setup but first required an Azure subscription within the IaaS (Infrastructure as a Service) part of Azure where as Azure AD and Office 365 sit on the SaaS (software as a Service) part of Microsoft Cloud. I followed this guide when configuring Azure AD DS: https://docs.microsoft.com/en-us/azure/active-directory-domain-services/tutorial-create-instance. The customer already had an existing Azure AD tenant, so I was able to configure the Azure AD DS instance to the same default domain.

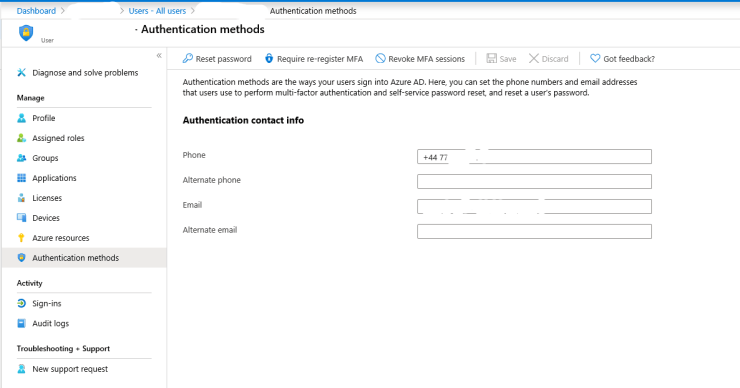
I found the configuration the easy part of this solution. The final part however required user input, which was to change there login passwords. A cloud-only user account is an account that was created in your Azure AD directory using either the Azure portal or Azure AD PowerShell cmdlets.

For cloud-only user accounts, users must change their passwords before they can use Azure AD DS. This password change process causes the password hashes for Kerberos and NTLM authentication to be generated and stored in Azure AD. You can either expire the passwords for all users in the tenant who need to use Azure AD DS, which forces a password change on next sign-in, or instruct them to manually change their passwords

Once this task was completed, I was able to add the Sever to the new AD DS domain as it sat within the same network (vnet) sub-net as the Azure AD DS instance and assign permissions to the Azure AD accounts to ensure the same security permissions that were in SharePoint Online were replicated to the Windows based file share! You can utilize an on-premises virtual machine, but this would require a Site-to-site VPN between your on-premises infrastructure and Azure to allow the virtual machine to communicate with the Azure AD DS instance.

From a cost perspective, Azure Active Directory Domain Services is £80 for up to 2500 identity objects which includes user accounts, groups and computers so its probably more cost effective to provision this than a VM Domain Controller in Azure as when you add the monthly VM cost along with licenses it can rack up.

Once the Identity Management and VM stage is completed, its time to provision and configure the Azure Files. Creating the Azure File share is straightforward enough, but step by step instructions can be followed here: https://docs.microsoft.com/en-us/azure/storage/files/storage-how-to-create-file-share . Once this has been created you need go into the configuration under settings and enable ‘Azure Active Directory Domain Services’ under the ‘Identity-based access for file shares’ section.

Now you need to give the relevant permissions to a user or group the necessary permissions at the share level. The Azure built-in groups for granting share level permissions are:

  • Storage File Data SMB Share Reader allows read access in Azure Storage file shares over SMB.
  • Storage File Data SMB Share Contributor allows read, write, and delete access in Azure Storage file shares over SMB.
  • Storage File Data SMB Share Elevated Contributor allows read, write, delete and modify NTFS permissions in Azure Storage file shares over SMB.

You can then mount the file share onto the Windows VM and assign the standard NTFS permissions via explorer as you would in an on-premises environment.

That concludes this post, I hope you enjoyed it and I would love to know what you thought so please feel free to leave a comment in the comments section or tweet me. Until next time, ‘IamITGeek’ over and out!

Exam MD-101: Managing Modern Desktops study guide and exam prep — February 3, 2020

Exam MD-101: Managing Modern Desktops study guide and exam prep

Salaam, Namaste, Ola and Hello!

Back in August I blogged about the MD-100 exam, the resources I used and how I prepared for this ( https://iamitgeek.com/2019/08/28/md-100-modern-desktop-associate-study-guide-exam-prep/ ). 

Last week I was successful in completing the second part of this certification, the MD-101 exam on Managing Modern Desktop and in this blog I will detail my journey, including:

  • Study Resources
  • Topics you need to cover
  • Exam Tips

For those who are not aware, the MD-101 is the second certification required for the ‘Modern Desktop Associate Administrator’ and focuses on Windows 10 deployment and management using services such as Azure Intune and SCCM (System Center Configuration Manager).

STUDY RESOURCES: To start my learning for this exam with the content on Pluralsight (https://www.pluralsight.com/). There are some great videos on here which gave me a good starting platform for my preparation. The main course series you will need to watch is “Microsoft Modern Desktop Administrator: Managing Microsoft Desktops (MD-101)” by Glenn Weadock. The course is 5 videos totaling up to 8 hours altogether which have the following headings:

  • Introduction to Microsoft Modern Desktop Administrator MD-100 and MD-101 Exams
  • Managing Microsoft Desktops: Deploying and Updating Operating Systems
  • Managing Microsoft Desktops: Policies and Profiles
  • Managing Microsoft Desktops: Managing and Protecting Devices
  • Managing Microsoft Desktops: Apps and Data

All the content is video based and I, like others I am sure needs more than just this to take in content. What i found worked really well for me was watching a video and then doing some practical content around that subject.

For example I would watch the video on ‘Managing Microsoft Desktops: Policies and Profiles’ and then login to my test Office 365 subscription and put what I just watched into practice by configuring policies and profiles, then deploying them to my test Windows 10 VMs.

I found the content was going in much better this way and I was ‘Learning by doing’ rather than watching and half of the information being forgotten.

The final resource I used for my preparation was the Microsoft OpenEDX learning resource (https://openedx.microsoft.com). I cannot speak highly enough about this resource as it blends written content with practical and test quiz questions which helps you test the skills you have learnt over the course. For the MD-101 it is split into three course:

  • MD-101.1: Deploying the Modern Desktop
  • MD-101.2: Managing Modern Desktops & Devices
  • MD-101.3: Protecting Modern Desktop & Devices

Each course has a great mixture of written, video, practical labs and a quiz at the end which I found to be a great blend for a learning resource.

TOPICS YOU NEED TO COVER: For a detail look at the skills that are measured in this exam I recommend reading https://docs.microsoft.com/en-us/learn/certifications/exams/md-101 which breaks down in detail each of the following sections:

  • Deploying and updating operating systems (15-20%)
  • Manage Policies and Profiles (35-40%)
  • Manage and protect devices (15-20%)
  • Manage Apps and data (25-30%)

EXAM TIPS: In my blog on the MD-100 I explained the over arching format with the standard multiple choice questions, scenario based questions and use case section which consisted of 7 questions. As with the MD-100 there was no lab in the MD-101 either, however I would recommend preparing as if there is a lab section just in case Microsoft decide to change it up.

The exam was 42 questions in total with the big use case to start (7 questions in total). Now I have done a few of the new format exams, I have actually found a great way to tackle these types of questions. What I found was that their is a lot of information to take in with these use cases and it can take up to 5 minutes plus to read through everything. What I did with both the MD-100 and MD-101 exams was is that I did not read the use case to begin with, and instead read the question first and then referred to the specific part of the use case I needed to read to be able to best answer the question.

I found this way of tackling the question saved a lot of time but also didn’t clog up my mind with a lot of information i didn’t need for the questions. As I mentioned there were 7 questions in this section, so I only needed 7 bits of information! Please note this is just my own experience with the exams in this format and it might not work for you.

Hope you find this helpful, if you would like any more information feel free to tweet me @shabazdarr or ask a question in the comments section below! I am planning on doing the AZ-500 exam next so will follow that up with another post!

Azure Advent Calendar – Azure Multi Factor Authentication (MFA) — December 6, 2019

Azure Advent Calendar – Azure Multi Factor Authentication (MFA)

Salaam, Namaste, Ola and Hello! My name is Shabaz Darr and this is the 6th day of the Azure Advent Calendar ( https://azureadventcalendar.com ). One of my main focuses in my role is Security, which is why I have chosen Azure Multi Factor Authentication as my topic for this blog.

Account passwords are historically one of the easiest security measures to hack, be it via ‘Brute Force attacks’ or users have simple passwords that are easy to guess. Attacks on organizations have become more complex over the years, however basic attacks, such as email phishing, that can be done by almost anyone are still a rather effective way of gaining access to an organizations most sensitive information.Multi-factor authentication is the process of identifying users by validating two of more characteristics that are unique to that users

Multi-factor authentication has evolved as the single most effective control to insulate an organization against remote attacks, and when implemented correctly (‘correctly’ being the key word), can prevent most attackers/threats from easily gaining an initial foothold into your environment.With so many MFA products out there, why use Azure MFA? It has most features that other leading MFA services offer, however I feel it’s the integration with the Microsoft Azure services as well as 3rd party applications that set it apart from other MFA services.

In the following blog, I will be discussing Microsoft interpretation of Multi Factor Authentication, requirements from a licensing perspective and finally the steps required within Azure to configure this.As I mentioned earlier, the definition of Multi Factor Authentication is when a user is granted access only after successfully presenting two or more pieces of evidence to an authentication mechanism. This can be explained in a very simple and clever way:

  • Something you know (typically a password)
  • Something you have (a trusted device that is not easily duplicated, like a mobile phone)
  • Something you are (biometrics like fingerprint or face)

Azure Multi-Factor Authentication helps protect access to data and applications with strong authentication via a range of different authentication methods:

Password: A users Azure AD password is considered an authentication method, one that cannot be disabled!

Security Questions: these are only available in Azure self-service password reset (SSPR) to non admin accounts. The questions can be less secure than other methods, so Microsoft recommend using them in conjunction with another method. There are many predefined questions to chose from, examples of which are:

  • In what city did you meet you first spouse?
  • What is your favourite food?
  • In what city was your mother born?
  • What is your father’s middle name?

Email Address: Microsoft recommends the use of an email account that would not require the user’s Azure AD password to access.

Microsoft Authenticator App: the Microsoft Authenticator app is available for Android, iOS and Windows Phone.

OATH hardware tokens: This open standard specifies how one-time password (OTP) codes are generated. Azure AD supports the use of OATH-TOTP SHA-1 tokens of the 30-second or 60-second variety.

SMS: Text message is one of the two phone authentication methods. An SMS is sent to a mobile phone number containing a verification code. The user must enter this verification code in the sign in page to continue.

Phone Call: This is the second phone authentication method. An automated voice call is made to the phone number provided. The user must answer the call and follow the automated instructions to continue. In both the Phone call and the SMS methods the mobile number is configured in the users Azure AD account.

App Password: App passwords come in handy with certain non-browser apps that do not support multi-factor authentication, however applications that use conditional access policies to control access do not need app passwords.

Licensing Requirements: Multi-Factor Authentication comes as part of the following offerings:

  • Azure Active Directory Premium or Microsoft 365 Business – Full featured use of Azure MFA using Conditional Access policies.
  • Azure AD free or standalone Office 365 licenses – Use pre-created conditional access baseline protection policies to require MFA for your users and Administrators

Before starting an MFA deployment in Azure there are prerequisite items that should be considered.

Microsoft recommend using Conditional Access to define their network using named locations. If your organization is using identity Protection, consider using risk-based policies of named locations. To configure a named location:

  1. Open Azure AD in the Azure portal
  2. Click Conditional Access
  3. Click Named Locations
  4. Click New Location and enter a meaningful Name
  5. Select whether you are defining the location using IP ranges or Countries/Regions
  6. Click Create

If using IP ranges decide where to make the location as trusted and specify the IP range. To enable MFA for users, in the Azure AD portal:

  1. Go to all users
  2. click on the Multi-Factor Authentication button

From this window you can manage user settings either on an individual basis or bulk number of users.  The settings available are shown in the below image:

You can also enable is disable the users MFA status.  There is also a ‘Service Settings’ tab where you can configure the following settings:

  • App Passwords
  • Trusted IPs
  • Verification Options
  • Remember Multi-Factor Authentication

App Password:  With this setting you can either allow or not allow users to create app passwords to sign to non-browser apps

Trusted IPS: With this setting you can specify IP addresses or full subnets where you want to bypass MFA.  This maybe trusted offices within your business or locations where you don’t want the MFA policy to apply.

Verification Options: With this setting you can specify the verification options you want available to users:

  • Call to phone
  • Text message to phone
  • Notification through mobile app
  • Verification code form mobile app or hardware token

Remember multi-factor authentication: You can specify if you want to allow users to remember MFA on devices they trust for a certain amount of days before they need to re-authenticate.

In summary, Azure MFA should be one of the first items you enable and configure in your Office 365 tenant to ensure a secure environment.  Hope you find this helpful, if you would like any more information feel free to tweet me @shabazdarr or ask a question in the comments section below!

Microsoft Ignite 2019 – Day three — November 7, 2019

Microsoft Ignite 2019 – Day three

We are officially half way through the conference and if you have been following my previous two blogs posts this week you will have seen its been filled with a variety of things including sessions, discussions and keynotes!

Today I decided to change it up a little and go more ’hands on’ with some labs so decided to only schedule two sessions:

  • ‘Azure VMware Solutions’
  • – ‘Reaching for the cloud: Group Policy Transformation to MDM with Microsoft Intune’

My first session wasn’t until mid morning, so I decided to get in a bit earlier for some breakfast at the HUB as I did yesterday. The one bonus I have found at the event that I wasn’t expecting are the random conversations I have had with other attendees and just listening to their stories. I mentioned this in my last blog and today was no different as I heard perspectives from professional who work for a Christian charity, a kids network TV channel and a manufacturing company. They all had one thing in common which was they use Azure, and in some cases use similar services, yet come from totally different business enterprises. This networking and meeting people from different walks of life has so far been one of the highlights this week!

After breakfast it was time to get my first session of the day which was ‘Azure VMware Solutions’. This is a platform that was announced earlier this year and something I have unsuccessfully tried to get a trial of, so it was good to get a more in-depth understanding of it. The platform is designed for every type of workload:

  • Modern Apps
  • Business and Mission Critical services
  • Dynamic and scalable

According to Microsoft, 90% of VMware on-premises customers want to run VMware in the cloud and 63% of VMware customers also considering running in the cloud natively. These types of numbers are what has driven Microsoft and VMware to put there differences aside and provide Azure VMware solution and you can now run your VMware workloads natively in Azure.

A massive positive of this solution for me is that it lets VMware trained IT professionals utilise the skills they have honed over the years as its still managed via vSphere!! There are currently on 3 regions where this service is available, however 11 Azure regions will have this service by May 2020 which implies there is massive investment on this platform by Microsoft. The other concern around cloud platforms I hear a lot of is if they abide by certain standards like ISO and so on, and all standard certifications are also coming early 2020 so it will be a fully certified platform as well.

The second half of the session was demo based and it was great to see the compatibility with on premises VMware as well as Azure NetApp files.

My next session wasn’t until late afternoon, so I decided to get to the hub and have some fun with ‘Hands on Labs’. The first lab I decided to do was based around using Azure Migrate to move VMware workloads to Azure and was a great follow on from my session. Initially I found the lab really good, clear instruction and it just worked. Probably due to the early time I went but I didn’t have to wait for a seat either which was not the case later on.

The lab took around an hour to complete, mainly as I was trying to take my time and fully understand the steps was doing, rather than just blindly following them. Once id finished, I had a walk around and bumped into a few of the Microsoft Teams MVPs (Chris Hoard – @Microsoft365Pro and Adam Deltinger – @deltanr1) and had more great conversations about their own journey to becoming MVPs. When I first heard about the MVP program my initial thought was I really want to target becoming one…however the more I thought about, in my opinion this is not something you should really aim to become…don’t have it as an end goal. Contribute to the community because you enjoy helping others and if the MVP award comes its just a bonus, and hearing both Chris and Adams stories just backed up my own thoughts.

After lunch I decided to hit up some more labs, but unfortunately my experience was much different. Once I arrived, I had to wait for about 20 minutes for a spare seat. One criticism I have of the labs is there is so much demand but only a small number of seats…my recommendation for next year is increase the number of seats. When I finally got a seat I started to load my next lab which was going to be using Azure Site Replication to recover VMware workloads…or so I thought. For some reason it kept loading the wrong lab, and after about 30 minutes of the lab helpers trying to fix it they couldn’t so I had to abort.

‘These things happen’ I thought, so I decided to do another lab around Exchange Hybrid and making meeting room management simpler. This time the correct lab loaded, however it was very slow, buggy, crashed several times, and after an hour I decided to give up. One of the more disappointing aspects of this was that the technical helpers were not able to assist, and a lot of the time just shrugged their shoulders. The first and hopefully last bit of disappointment at the conference!

I decided I needed cheering up, so had a stroll around the HUB and took part in some of the interactive games which was really fun, including a game of Fuss ball against a robotic arm…which I lost as well as a few others.

I moved onto my last session of the day ‘Transitioning your group policy workloads to the Cloud’. This is something I was intrigued to understand as I have wondered what is the best way to migrate on premises group policy to Intune. Intune MDM is great for Cloud only users, and even Hybrid users can take advantage of a lot of the features. According to Microsoft, customers face the following problems:

  • Policy Gaps: Legacy Group Policy settings are note supported by Modern Management
  • Feature Depth: Modern Management does not support Group Policy features
  • Enhanced targeting: Targeting with AAD Security Groups isn’t as rich as targeting in AD/GPO

Microsoft have the following approach to solve these problems:

  • Fill the gaps: Intune support CSE settings for example
  • Add new features: Intune policy analytics to assist with understanding current Group Policy landscape & MDM support for example
  • Give real world guidance: Practical case study-documented approach guides customers with proven plans and results in the transition for example

The session was shorter than most others I have sat in and ended with a short demo which unfortunately was more of an overview of some features rather than a deep dive.  This brought an end to day three.

Shabaz Darr is a Senior Professional Services Consultant at Concorde Technology Group in the UK. Shabaz’s primary responsibility is providing technical expert knowledge in both Cloud and Security to Concorde’s customers and partners. As an avid techie, Shabaz enjoys learning and working with new technology and can be found on twitter at @ShabazDarr https://www.linkedin.com/in/shabaz-darr-900b8361/ https://twitter.com/ShabazDarr

Microsoft Ignite 2019 – Day Two — November 6, 2019

Microsoft Ignite 2019 – Day Two

As I mentioned in my day one bloghttps://iamitgeek.com/2019/11/05/microsoft-ignite-2019-day-one/), I decided against packing that day full of sessions so I could get my bearings and take in a lot of the Hub as well as the main keynote talks. Day two was very much about sessions, with my main focus of the day being Security.

For those who follow me on social media (see the bottom of this post for the handles) you would have seen a sneak peak of some of the sessions, however I have said the juicy details for this blog post!

My planned sessions for today were:

  • ‘Protect your cloud workload from threats using Azure Security Centre’
  • ‘Secure your enterprise with strong identity foundation’
  • ‘Deep Dive into Azure policy and Governance’
  • ‘Top ten security practises in Azure today’

My first session wasn’t until mid morning, so I decided to grab some breakfast in the ‘HUB’ during which I had some amazing conversations with other people in the industry. One of the highlights and take a way’s from this week will definitely be listening to other IT professionals stories, and how they go about managing their customer base, as well as some of the products they use to do this.

One of the other great things about these type of conferences is you get direct, face to face time with the actual vendor engineers which is super helpful and allows you to ask questions around problems you are having with your own ongoing work. I managed to get some amazing information from the SharePoint team and the Intune App deployment team on some problems I am having on an ongoing project which I can take back with me to hopefully solve some issues.

After a very productive morning it was time for session on of the day: ‘Protect your Cloud workload form threats using Azure Security Centre’. The session was broken down into four areas of ‘Intelligent Security’ –

  1. Identity and Access Management
  2. Threat Protection
  3. Information Protection
  4. Cloud security

Microsoft believe the ‘Workloads are heterogenous and hybrid’ so its not only about protecting your cloud environment, you also need to protect the on premises environment. The most common threats Microsoft see are around the following:

  • Virtual Machines
  • Containers
  • App Services
  • SQL DBs
  • Storage Accounts
  • Key Vault

To help you manage all these different identities and services, Microsoft have totally re-vamped the Azure Security Centre which now includes the Office 365 Security score. Its now based on two main pillars:

  • Strengthening Security Posture
  • Protect against threats

For me the one area that really hit home was about ensuring you protect your VM workloads by reducing open network ports and protecting against malware, something I see issues with a lot in my role. New announcements was also becoming a regular theme and this session was no different with the announcement that Microsoft now offer built-in vulnerability assessments for VMs which is available as part of the standard VM pricing!

The session finished with another new announcement was new advanced protection capabilities for data services which is now in preview, which includes:

  • Protecting SQL servers on Azure VMs
  • Malware reputation screening for Azure storage
  • Advanced Threat Protection for Azure Key Vault

After a not so short walk I was at my second session of the day: ‘Secure your enterprise with strong identity foundation’. Although this wasn’t a very technical session it was very insightful into how much development Microsoft are actually putting into Azure AD, and how they actually see it as being more secure than Active Directory on premises.

The session touched on a number of different sub topics around identity management, one being getting to a world without passwords. For me this was a very strange concept as passwords have been present since the day I came into IT, however it is also one of the biggest vulnerabilities as well. How many times have you had to deal with security issue due to a brute force password attack?

The future for Microsoft appears to be based around bio metrics, including face recognition, finger print scanning and biometric key fobs. Now you might think these types of technologies have been around for a while, for example Windows Hello in Windows 10, as well as Banks using biometrics to login into Internet banking. The difference is rather than using these as and when, Microsoft want these to take over from the password, bringing of age a world without passwords!

Another take away from this session for me was around utilising Azure AD for all your 3rd party apps, not just Microsoft based apps, which is done via SSO (Single sign on) and Azure App Proxy. The session also touched on subjects including: –

  • Conditional Access and using smart protection policies and risk assessment to grant access
  • Azure AD Identity Protection
  • Self Service Password reset

After a short lunch break in the Hyatt Regency I was refuelled and ready for the third session of the day: ‘Deep Dive into Azure Policy and Governance’. It turned out that although very interesting, this session went a little over my head, mainly due to it being a lot of live demos using Azure Shell.

The most interesting part of the session for me was seeing the road map for Azure policy which includes:

  • Regulatory Compliance
  • Multi-tenancy support for Azure Lighthouse
  • Authoring and language improvement
  • Dataplane policy
  • Remediation for custom guest configuration policy
  • Continued partner integration

The final part of the session was around Azure Resource Graph and in what type of scenarios you can use it, as well as what’s new this year with this service

The Final session of the day was ‘Top ten best security practises for Azure today’ and a great way to finish off what was a great day two! For those who are familiar with Azure Security there were no real surprises, but for those who aren’t, according to Microsoft the following are a must if you want to keep your Azure resources secure:

  1. Operationalize Azure Secure Score. What they mean by this is assign stakeholders to use Secure score and monitor your score and continuously improve your security posture. Rapidly identify and remediate common security hygiene and setup regular reviews of the Azure Security score
  2. Administration – Account protection. This means password-less or MFA for all Admins
  3. Enterprise Segmentation and Zero trust preparation. Unify network, identity and app teams to align segmentation.
  4. Monitor for Attacks, including VMs on Azure, 3rd party VMs, Azure SQL DBs, Storage accounts and more.
  5. Applications – Secure DevOps
  6. GRC – Key Responsible parties. Ensure there are clear lines of responsibility within your team on network security, network management, server endpoint security, policy management and identity security & standards
  7. Networks and Containers. This is the Internet and Edge security and ensuring you are using some type of firewall
  8. Applications – WAF. Use web app firewalls on all internet facing applications
  9. Network and Containment – DDoS mitigations
  10. Network – Deprecating legacy technology

This brought an end to day two of the Microsoft Ignite Conference, stay tuned for update through out day three and more blog posts!

Shabaz Darr is a Senior Professional Services Consultant at Concorde Technology Group in the UK. Shabaz’s primary responsibility is providing technical expert knowledge in both Cloud and Security to Concorde’s customers and partners. As an avid techie, Shabaz enjoys learning and working with new technology and can be found on twitter at @ShabazDarr https://www.linkedin.com/in/shabaz-darr-900b8361/ https://twitter.com/ShabazDarr

Microsoft Ignite 2019 – Day one — November 5, 2019

Microsoft Ignite 2019 – Day one

This is probably the biggest technical conference of the year with almost 30k people from all over the world attending throughout the week. Over the next few days I will be blogging about my experiences and takeaways from each day as well as giving you insights into the new announcements made by Microsoft this week.

My personal Conference experience started on Sunday morning as the registration and ‘Swag’ pickup was open at the conference location which is the Orange County Convention centre. Microsoft have done a great job of making this as painless as possible by not only allowing you to do this at the event location but also at the baggage claim at Orlando International Airport! As mentioned there was also ‘Swag’ pickup but this was only possible from the venue and there was some great items including a rucksack, water bottle and t-shirt!

Today (Monday) I decided to get up early (or so I thought) and arrived at the venue for 7:30 to queue up for the Vision and Tech keynotes. I was surprised to find how busy it was already with massive queues for all keynote areas, however I was lucky enough to get a seat in the Security Technical Keynote where there was also a live feed to the Vision Keynote. There were many other places around the venue you could watch the keynotes as well so this made sure no one missed out!

Before the keynote started there was an interactive game of Jeopardy but based around Microsoft Security (I believe the three keynote theatres had a different subject). For me this was a great starter before the main keynote, as it was engaging the crowd as well as an opportunity to learn!

At around 9am it was finally time for the Vision Keynote by Microsoft CEO Satay Nadella. The ‘buzz phrase’ or theme of the keynote was ‘Tech Intensity’ which was described as ‘tech adoption x tech capability to the power of trust (Tech Intensity = (tech adoption x tech capability) ^ trust). After a short introduction the topic changed to the Azure Stack including Azure stack hub and hci, but rather than go into detail or show a short video which is more common with Keynotes, Satay handed over to colleague on the ‘shop floor’ (which was basically the main hub) to showcase some of the stack and HCI products. As you will see this was a regular theme of this vision keynote and kept the flow session and interest of the crowd.

One of the first new announcements was Azure Arc which is a service for customers who want to simplify distributed and complex environments across on- premises, edge, and multi-cloud. It allows deployment of Azure Services anywhere and extends management to any Infrastructure. For me this is really geared towards enterprise customers who have infrastructure not only in their data centres but also multiple cloud environments and need a better way to manage this. For more information on this take a look at the following link: https://azure.microsoft.com/en-us/blog/azure-services-now-run-anywhere-with-new-hybrid-capabilities-announcing-azure-arc/

This was quickly followed by the next new announcement: Azure Synapse is a limitless analytics service that brings together enterprise data warehousing and big data analytics. As before there was another live demo to showcase this new service, however what I didn’t like in this was the negativity towards there competitors. I have seen it before where vendors try to promote there new product by belittling the main rivals similar products, and it was the case here. The demo and service look really impressive so I felt it didn’t need to do this. Vendors should be confident in there own product enough so they don’t have to bad mouth the competition. For more details around this new service, have a look at the following link: https://azure.microsoft.com/en-us/blog/simply-unmatched-truly-limitless-announcing-azure-synapse-analytics/

The next interesting announcement (or at least the first time I have heard of it) was ‘Project Silica’ which is developing the first ever storage technology designed and built from the media up for the cloud. For more information on this, take a look at https://www.microsoft.com/en-us/research/project/project-silica/ .

The new service announcements did not stop there, the next being Azure Quantum. This is a diverse set of Quantum services ranging from pre-built solutions to software and quantum hardware. For further insight into this new service take a look at this link: https://azure.microsoft.com/en-us/services/quantum/

One of the more notable and interesting announcements for me was the new Microsoft Edge Chromium browser, which utilises Bing search facilities along with Edge services for a new enhanced browser which is more secure and allows you to search not only the web but your internal Intranet. Again there was a really interesting demo which highlighted all the key concepts and features which was really impressive.

The Vision Keynote finished with a game of the new ‘Minecraft Earth’ game which was very entertaining and a fun way to finish the session. The next keynotes were all based around technologies and you had the choice of Applications, Infrastructure, Data and AI with Jason Zander, Modern Workplace with Jared Spataro, Security with Kirk Koenigsbauer and Business Apps with James Philips. I decided to sit in on the Security keynote which was a good choice it turned out! Similar to the Vision Keynote it was a mixture of talking and live demos which kept it really engaging!

In the keynote it discussed Zero trust which is a combination of ‘verify explicitly’, ‘least privileged access’ and ‘minimise impact of breaches’. Some of the live demos included the new Insider Risk management in Microsoft 365 which protects you from internal risks and breaches and Azure Sentinel which is a birds eye view of your enterprise which sees and stops threats before they can cause harm ( https://azure.microsoft.com/en-us/services/azure-sentinel/).

The various keynotes took up most of the morning, so after lunch I decided to take a walk around the ‘HUB’ area. I decided not to book too many sessions on the first day as it is easy to get overwhelmed at these events, so I spent a few hours going round the various vendor booths including Netapp, Veeam and Lenovo.The one session I did book for the end of the day was ‘Exam prep for the AZ-300’ exam which is something I am looking to complete early next year

Shabaz Darr is a Senior Professional Services Consultant at Concorde Technology Group in the UK. Shabaz’s primary responsibility is providing technical expert knowledge in both Cloud and Security to Concorde’s customers and partners. As an avid techie, Shabaz enjoys learning and working with new technology and can be found on twitter at @ShabazDarr https://www.linkedin.com/in/shabaz-darr-900b8361/ https://twitter.com/ShabazDarr

MD-100: Modern Desktop Associate study guide & Exam prep — August 28, 2019

MD-100: Modern Desktop Associate study guide & Exam prep

Modern Desktop Administrator

Salaam, Namaste, Ola and Hello!

This is my first blog in a few months due to various different commitments, including spending more time around my learning. I have recently (the day of writing this in fact) passed my MD-100 exam and in this blog I will take you through my journey, including:

  • Study Resources
  • Topics you need to cover
  • Exam tips

For those who are not aware, the MD-100 is the first of two exams you need to gain the certification known as ‘Modern Desktop Associate Administrator’. This certification is all based around Windows 10, including upgrading from older OS versions, the different ways in which you can keep it updated and also the security that Windows 10 brings with it.

STUDY RESOURCES: There are a few different ways you can go about studying for an exam, either a tutor led course or self paced learning. For this specific exam I decided to go for the self paced learning approach and the best way I found to get started was the Microsoft Learning resources which are free and can be done at your own pace. To get started on my MD-100 journey I worked through the following course from the learning site:

There are a lot more resources around the Modern Desktop subject, but none that relate to this specific exam. The second free resource I found really useful is again thanks to Microsoft: https://partner.microsoft.com/en-us/asset/collection/modern-desktop-associate-certification-part-1-exam-md100#/

Again these are self paced training videos but much more interactive than the learning paths as you have labs as well as interactive activities you need to complete which can actually be quite fun! Another positive about this resource is that each module has a set of questions that you are graded on and at the end of the full course you have a final test and in some cases a lab which is marked. The reason this resource was probably the most useful was because of how interactive it was with the labs as well as the mark tests, as this gives you hands on practice and realistic questions which allows you to judge if the information you are learning is actually going in or not!

The final resource I used was a Plurasite course which was all video and reading based. Personally this was the most difficult to get through for me as I found the watching and reading only element very mundane. Some of the videos within the training were very useful however as they were based around real life engineers being interviewed and giving there experience around the subject matter, be it Windows update, Installing Windows or even the security side. Unlike the Microsoft learning site which are free, Plurasite is a subscription based site but again I highly recommend investing in it.

TOPICS YOU NEED TO COVER: You can find the main topics to cover on the Microsoft exam site: https://www.microsoft.com/en-us/learning/exam-md-100.aspx. Topics they suggest include Deploy Windows, Manage devices, Configure Connectivity and Maintain Windows. I recommend you cover all these as suggested, however the following should be covered in greater depth:

  • NTFS permissions
  • Windows permissions
  • Group Policy
  • Powershell Commands
  • AutoPilot
  • Bitlocker

EXAM TIPS: The new Microsoft exam format covers a few different question types, with your standard multiple choice, scenario based where they have multiple questions based on one big use case and finally practical labs. With this particular exam however I did not get any labs. The exam was 45 questions, 40 of which were multiple choice and 5 were based on one big scenario. I do not think there is anything new I can tell you about the multiple choice questions that you do not already know, however with the scenario based questions I was not to bothered about reading the full scenario in to much detail as you can always refer back to it. Once I skim read it, I looked at the question, found the relevant part in the scenario which I read in detail and then looked at the possible answers. I found this saved a lot of time and needless reading of information that is not really valid for the questions. One thing to note is that I had over 2 hours to complete the 45 questions in, which means you can take your time and even go back and review your answers before finally submitting them.

Hope you find this helpful, if you would like any more information feel free to tweet me @shabazdarr or ask a question in the comments section below! I am planning on doing the MD-101 exam in a few weeks so will follow that up with another post!

Until next time, ‘IamITGeek’ over and out!

Veeam Backup & Replication – Utilize Azure Blob Storage — April 29, 2019

Veeam Backup & Replication – Utilize Azure Blob Storage

Salaam, Namaste, Ola and Hello!

For those who are new to my blog welcome, and to those returning a big thanks! In my last series (https://iamitgeek.com/2019/04/15/veeam-cloud-connect-in-azure-part-1/ and https://iamitgeek.com/2019/04/17/veeam-cloud-connect-in-azure-part-2/) I discussed using Veeam Cloud Connect in Azure. Now this series was targeted at Managed Service Provider (MSP) type companies. In this weeks series I will discuss how to utilize Azure Blob storage via Veeam Backup & Replication.

Veeam Backup to Azure Blob

In part one of this series I will go through an overview of the title topic, what requirements you need to meet for this feature, a brief description of the setup tasks you need to complete (I will go into full detail in part two of this series) and the benefits this feature can offer you as a business.

Overview: Earlier this year Veeam released version 9.5 Update 4 of their Backup & Replication product, and with this new release they have introduced the capability to scale out your on premises repository to cloud object storage including Azure Blob. The new feature allows backup admins to archive older backups into Azure blob storage by adding it into Veeam as a ‘Scale-out Repository’ rather than a standard backup repository. Most companies will already be backing up there data offsite in some shape or form (if you are not you should be!!), either in a secondary site owned by them or to a Service provider. In the first instance it requires you to have a building in a geographically separated location with some sort of Infrastructure in place. This type of setup can be very costly from a financial and time perspective, however Cloud object storage takes a lot of this away. In the second instance, Service Providers do take the headache of day to day management away, however I believe would struggle to match the cost efficiency of public cloud object storage.

Requirements: Before you can go ahead and utilize this feature you need to meet certain prerequisite requirements:

  • Ensure Veeam Backup & Replication is updated to 9.5 update 4

As mentioned this is a new feature which is only currently available in update 4 of version 9.5 so this should really be your first step on this journey

  • A pay as you go or CSP Azure Subscription

You will need to have an existing Azure subscription where you can create the storage required for this feature to work. If you are able to get your subscription via a CSP partner I would recommend doing this as it works out cheaper than using the standard pay as you go subscription.

Setup Tasks: You should be at the point where you have now successfully upgraded your on premises Veeam Backup & Replication management software to 9.5 update 4 and provisioned an Azure subscription. Other initial setup tasks include creating a storage account in Azure, provisioning the Blob container you will archive the backups in, add a scale-out repository pointing at the Azure blob and finally re-configuring your existing Veeam backup jobs to archive your backups to the blob storage.

Pros and Cons: Like everything in this world there are two sides to it, and really its about what suits you as the individual company. For me this latest feature has the following positives:

  • Cost Effective – If you host your own offsite storage or use a service provider, Azure Blob storage costs will be more cost effective than both of these
  • HA & better redundancy – your own Infrastructure or Service Providers cannot compete with the high availability and redundancy offered by Microsoft Azure. A lot of Service Providers will claim they can, but in reality losing more than one Data Center would be catastrophic, where as Microsoft could cope with potential multiple DC failures.
  • Scale out to Cloud: For companies that need to keep older backups but do not necessarily want to spend additional on premises storage, this feature is ideal and allows you to scale and extend your on premises storage into the cloud.

And the cons:

  • Potential Compliance issue: This all depends on your companies compliance policies when it comes to data, and using public cloud may not be an option due to this.

So it turned out to be ‘con’ rather the the plural but that’s my point, this latest feature has more positives than negatives.

That is it for part one, keep an eye out for part two where I will go into more details on how to configure the both the Azure Blob Storage and Veeam Backup jobs for this feature. Until next time, ‘IamITGeek’ over and out!


Veeam Cloud Connect in Azure – Part 2 — April 17, 2019

Veeam Cloud Connect in Azure – Part 2

Salaam, Namaste, Ola and Hello!

For those who are new to the blog, welcome, and to those returning a big thanks! In part one of this series ( https://iamitgeek.com/?p=145 ) I discussed the Veeam Cloud Connect offering within Azure for Service Providers, some of the requirements as well as the initial configuration within Azure portal. In part two I will walk through the configuration of Veeam Cloud Connect and some of the different options that can be offered to customers.

Veeam Cloud Connect Service

I finished the previous post at the point where we had provisioned the virtual machine. Once this process is completed you need to ensure the version of Veeam Backup & Replication installed on premises matches the version installed in Azure, and as I mentioned the version currently available within Azure is 9.5 update 3 which is not the latest version. After upgrading Veeam, we are ready to start configuring the Veeam Cloud Connect Service Provider platform.

When you initially login to the Azure virtual instance the Veeam Cloud Connect Wizard will automatically start. To proceed any further you will need your Service Provider license which you should be sent once you have registered with Veeam for the Service Provider rental agreement. The rest of the wizard then takes you through the steps you need to follow in the Veeam Backup & Replication software both on-premises and Azure. The steps include the following:

  • Configure Cloud Gateway in Azure: Customers, or ‘tenants’ do not communicate with the repositories in Azure like they do when dealing with an on premises Veeam server. Instead the Cloud Gateway is used to mask the repositories so they make a connection (by default over port 6180) to the service provider cloud gateway. You will need to ensure you configure a DNS name on the Azure virtual machine before you can do this.
  • Configure Cloud Repository on the Azure Virtual Machine: This needs to be a location on an attached disk where you will store all your tenants backups. You may need to create some storage within the Azure platform and attach it to the virtual machine before you can do this.
  • Configure Tenants in Azure: You will need to configure a tenant username, password and repository within your main backup location for each customer. Most important part of this is ensuring you document credentials for each tenant as these are needed when configuring the backup job on premises.
  • Add the Service Provider on-premises: In Veeam Backup & Replication you need the customer to add you as a service provider. You will need to give them your Cloud Gateway FQDN and the port (6180) and they will need to ensure that this port is allowed outbound to ensure Veeam can communicate with Cloud Connect platform in Azure.

At this point the majority of the configuration is completed, however we are still not ready to send data into the Azure platform. Before we can do this we need to ensure the transfer of data is secure, which is done by installing and configuring an SSL certificate which will allow you to encrypt data in transit so customers data is secure whilst being backed up.

Data Encryption

The final part is to setup the backup jobs so the customer can start backing up data to the Veeam Cloud Connect service hosted in Azure. With the backup configuration you have the exact same features you would with an on premises backup job, including the notification features as well as scheduling.

The main benefit of the Azure offering of the Veeam Cloud Connect service is that not all Managed Service Providers have the luxury of being able to host a private data center where they can house the amount of Infrastructure required for a good size Veeam Cloud Connect Service. The Azure offering takes care of that issue and more, as with most private cloud services you get the added redundancy, durability and availability of the Microsoft Azure Data Center. Also Azure have added disk sizes that makes it a much more scalable cloud provider offering.

That concludes my blog series on Veeam Cloud Connect in Azure, I hope you enjoyed this series and I would love to know what you thought so please feel free to leave a comment in the comments section. Until next time, ‘IamITGeek’ over and out!

Veeam Cloud Connect in Azure – Part 1 — April 15, 2019

Veeam Cloud Connect in Azure – Part 1

Salaam, Namaste, Ola and Hello!

For those who are new to the blog, welcome, and to those returning a big thanks! In this weeks blog series I will be taking a closer look into utilizing Azure IaaS for backing up, in particular the Veeam Cloud Connect Service in Azure.

Veeam Service in Azure

This service is more applicable if you are a Managed Service Provider (MSP) as it allows you to host your customers backups on a multi-tenanted platform, offsite into the public cloud. Most IT professionals will have heard of Veeam and its range of products as they are one of leading vendors when it comes to data backup and replication. In part one of this series I will discuss the requirements as well as the initial configuration steps within Azure.

Veeam Cloud Connect in Azure Overview

The above diagram shows an overview of how the Veeam Cloud Connect service looks. As you can see you have multiple customers backing data over an SSL connection to cloud repositories in Azure. To be in a position to use this service, the end user/customer needs to meet the following prerequisites:

  • A Veeam Backup & Replication server is deployed and functioning in their on-premises infrastructure
  • The infrastructure is running on Microsoft Hyper-V or VMware (Veeam Agent for Windows is also supported for physical Windows servers)
  • The Veeam Backup & Replication Server has an Internet Connection

I will not be covering it in this blog but Backing up Office 365 mailboxes using Veeam Cloud Connect is also supported. For a Managed Service Provider to be able to offer this service they must meet the following prerequisites:

  • A current Azure tenant subscription
  • Is a Veeam Cloud Service Provider and has signed a rental agreement

Before going into the steps required to configure this service lets go through some of the key roles and concepts:

Roles and Concepts: The communication in Azure is between two parties, the Service Provider and the tenant. The Service Provider is the organization that provides the cloud infrastructure (mainly the repository) to the tenants, and the tenant is the customers who send data off site and stores their backups in the cloud infrastructure.

In Azure, the Service Provider needs to perform the following tasks:

  • Configure the Veeam Cloud Connect Infrastructure
  • Create the relevant backup repositories
  • Setup SSL certificates to allow for data encryption in transit
  • Create Cloud Gateways
  • Create and document the tenant user accounts

The customer (or in this case ‘tenants’) need to perform the following tasks:

  • Connect to the Azure hosted Veeam Cloud Connect platform from their on-premises Infrastructure.
  • Configure backup jobs targeted at the Veeam Cloud Connect repository

To get started with the Veeam Cloud Connect service in Azure you need to provision the virtual machine first via the ‘Azure Marketplace’. Now you have two options and it all depends on your requirement. If you are an Enterprise level company wanting to extend your backups offsite into Azure then ‘VCC for the Enterprise’ is the correct choice. For Managed Service Providers (MSP) who wish to run a multi tenanted solution in which they can send multiple customers backups into Azure then ‘VCC for Service Providers’ is what they require and that is what I went for.

Veeam Cloud Connect for Service Providers

One thing to note is the current version in the bottom left. As of the time of me writing this post, the latest version of Veeam is 9.5 update 4a which means the version in Azure is out of date. This means that if you are good with your patching and your on premises Veeam services are at the latest version you will need to update the version in Azure once the virtual machine is provisioned.

When you click on ‘Create’ it then takes you to create a virtual machines where you can select the relevant configuration including:

  • Virtual Machine name
  • Azure Region
  • Resource Group
  • Size
  • Administrator username and Password

That is it for part one, keep an eye out for part two where I will go into more details configuring the Veeam Cloud Connect Platform. Until next time, ‘IamITGeek’ over and out!